


The Advanced Map Widget, renders an interactive Google or Bing Map with Marker locations. Using this widget on your site allows you to highlight physical locations of your organization.
This Widget uses two custom elements; one for Map configuration data and primary location and another element to manage data of multiple secondary locations. This advanced element setup can be used to place the same Map and Marker configurations on multiple pages throughout the site.
The Advanced Map Widget will display multiple maps if provided more than one primary record whereas the basic Map Widget will display multple Markers on the same map when provided with more than one record.
For developers, the element fields, Generic Render Handler file and included Cascading Style Sheet file may all be modified to fit your specific content’s custom display scenario.
For example, if you already have several (dozens or hundreds) of geographical locations defined (stores, schools, ponds, rest areas, etc) add fields for Latitude and Longitude and generate a map for each of your locations.
The Map Widget offers the following configurable properties via the Custom Metadata Form bound to the Generic Render Handler:
Map Options (tab)

- Width - The width of the map.
- Height - The height of the map.
- Zoom - The starting zoom level of the map. Choose 1 to be fully zoomed out, Choose 20 to be fully zoomed in.
- Alignment - The alignment of the map within its container.
- Padding - Padding around the map.
General Properties (tab)

API Authentication (tab)

- Map Service API Key - The API key from the particular map service (Google or Bing)
Data for the map markers is entered directly into the custom element.
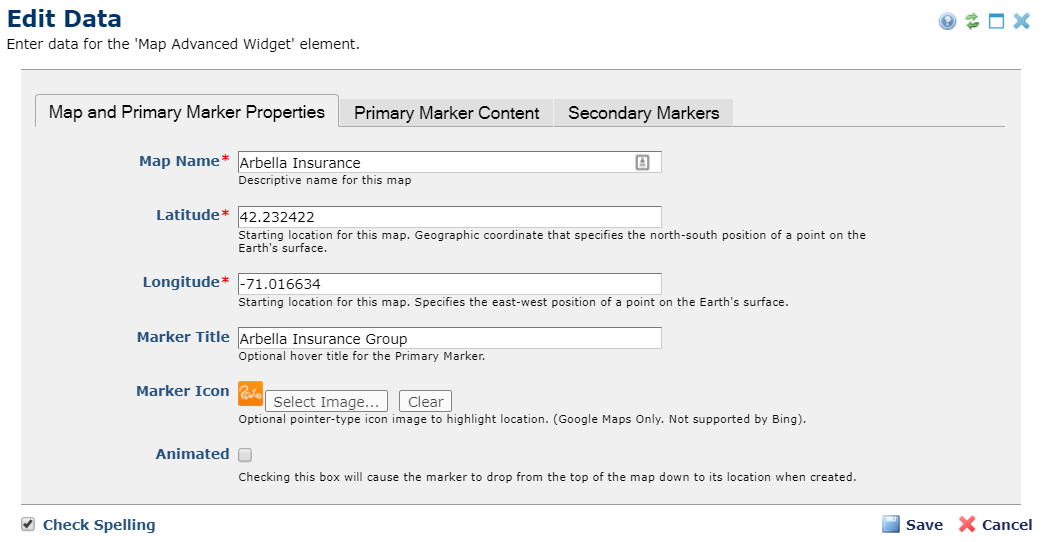
Map and Primary Marker Properties (tab)

- Map Name - Enter a descriptive name for the map. This name does not render on the page.
- Latitude: Get this number from a Bing or Google map.
- Longitude: Also get this number from a Bing or Google map.
- Zoom: This number determines how close or far away you are from the coordinates.
- Values range from 1=Earch (as seen from space) to 20=Max Zoom (the closest the map allows)
- The default setting is 15.
- Marker Title: The optional hover text of the Primary Marker
- Marker Icon: choose a different icon from an image you provide.
- Animated: Checking this box will cause the marker to drop from the top of the map, down to its designated location.
Primary Marker Content (tab)
This is a Formatted Text Block where you may type the content that appears in the bubble when you click the marker.
Secondary Markers (tab)
This opens the other bound Custom Element that stores the Secondary (all markers except the first one entered on the first two tabs) Marker information. The fields are the same as the Primary Marker. All Secondary Markers will render when the Primary Marker is included on a map.
Note: Due to the complexity of this widget, two Global Custom Elements are required.
- Map Widget
- Map Widget Markers
These two Elements work together using the ADF Data Manager Custom Field Type in a relational data approach. Optional Elements available for this widget are two Generic Render Handlers which come in the .zip archive package with the Map Widget Global Custom Element.
You can also bind this widget's standalone Generic Custom Render Handler to your own Custom Elements (Local or Global) that contain similar fields (even if it has different field names).
The default 'Map Widget' Custom Element has the following properties:
Map and Primary Marker Properties (tab)
- Map Name - A descriptive name for this map.
- Latitude - The latitude coordinates of this primary location.
- Longitude - The longitude coordinates of this primary location.
- Marker Title - Optional hover text for this primary marker.
- Marker Icon - Select an icon to use for this marker.
- Animated - Checking this box will cause the marker to drop from the top of the map down to its location when created.
Primary Marker Content

- Info Window HTML - Optional. The HTML to be displayed in a hover window when the user selects the marker.
Secondary Markers

- Markers Data Manager - The ADF Data Manager field allows you to create, edit and delete additional markers that appear on the map. Simply click the 'Add New Map Advanced Widget Markers...' button to create a new marker. Or click the corresponding Edit or Delete icon to edit or delete an existing marker. Upon clicking Add or Edit the Map Advanced Widget Marker record is displayed.
-
Map Marker Properties (tab)
-
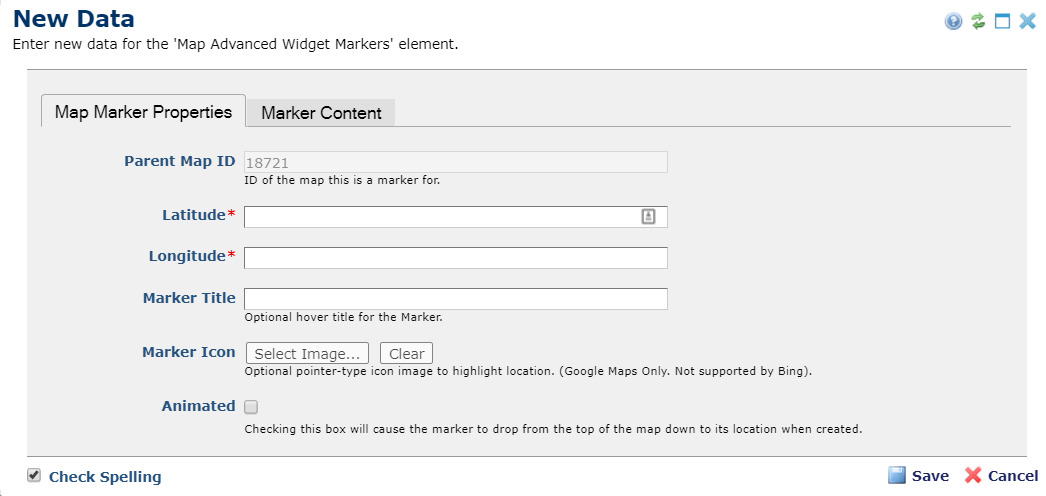
- These are the same properties as defined for the Map Widget
-
Marker Content (tab)
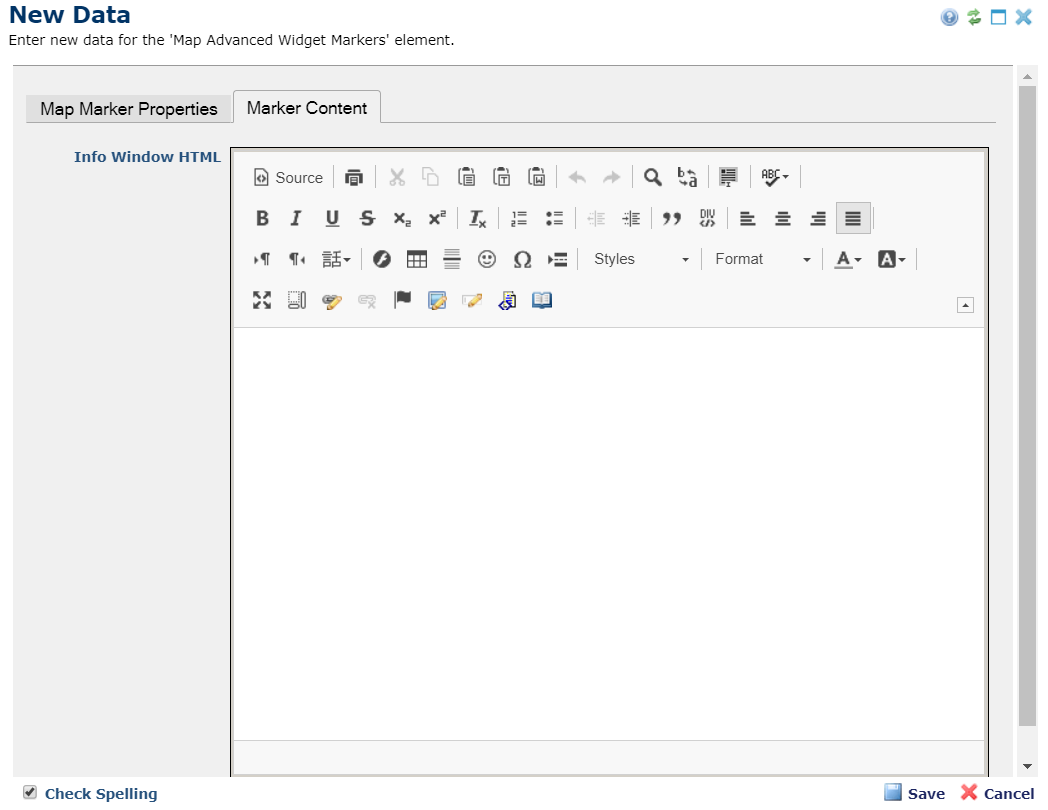
- These are the same properties as defined for the Map Widget
Required Custom ‘Map Widget’ Element Fields
- ID (Hidden Field)
- Name (Text Field)
- Latitude (Text Field)
- Longitude (Text Field)
- Title (Text Field)
- Icon (CommonSpot Image Field with configured Image Gallery)
- Animated (Checkbox)
- Info Window HTML (Formatted Text Block)
- Markers (Custom Element Data Manager Field bound to the Markers Global Custom Element)
Required Custom ‘Map Widget Markers’ Element Fields
- ID (Hidden Field)
- Map ID (Text Field for Parent Map “ID”)
- Latitude (Text Field)
- Longitude (Text Field)
- Title (Text Field)
- Icon (CommonSpot Image Field with configured Image Gallery)
- Animated (Checkbox)
- Info Window HTML (Formatted Text Block)
The Advanced Maps Widget has the following importable components contained in the master import packet:
- Global Custom Elements
- There are 2 Custom Elements
- Map Widget
- Map Widget Markers
- There are 2 Custom Elements
- Metadata Form
- Generic Render Handlers
- There are 2 Render Handlers
- Google Map Generic Render Handler
- Bing Map Generic Render Handler
- There are 2 Render Handlers
Because this widget's render handlers are written as “generic" Render Handlers you can either use the provided Custom Elements, or use your own existing Custom Elements on your site instead.
If you want to use the provided global Custom Elements, do the following:
- Download & Import the Global Custom Elements
- Download & Import the Metadata Form
- Confirm the Metadata Form is bound to the Render Handler(s)
If you plan on using your own custom element, do the following:
- Download & Import the Metadata Form
- Download & Import the Render Handler(s)
- Confirm the Metadata Form is bound to the Render Handler(s)
- Map your Custom Element fields to the Generic Render Handler(s)
For detailed information on how to import the various components, please see Importing Widgets.