This page documents how to import a CommonSpot Widget into your site. It is broken down into the following sections:
- Understanding Widget Components
- Importing the Widget Packet
- Importing Custom Elements
- Importing Metadata Forms
- Importing Render Handlers
- Binding Metadata Forms to Render Handlers
- Mapping Custom Element Fields to Generic Render Handlers
- Widget Page/Template Setup
- Overriding Fields/Parameters in a Widget
Understanding Widget Components
In general, it is important to understand the possible components that make up a CommonSpot Widget. Some components are required, while others are optional. Here's a quick listing of the possible components and some information about each.
- Render Handler(s) (required)
- Provides the rendering for the widget.
- A widget may have one or more render handlers.
- Typically the render handlers are implemented as a 'Generic' render handler, which means they can be bound to any custom element.
- CSS File(s) (typically required)
- Provides CSS styles to control the rendering of the widget.
- You can override the styles by providing a custom CSS file.
- CSS files are automatically included in the 'default custom element' and 'render handler' downloads. You don't need to download these independently.
- JavaScript File(s) (optional)
- Provides JavaScript logic to initialize and/or configure the widget.
- JavaScript files are automatically included in the 'default custom element' and 'render handler' downloads. You don't need to download these independently.
- Metadata Form (required)
- Provides properties that apply to the overall widget and are editable by content contributors.
- These properties are accessed by binding the Metadata Form to the appropriate Render Handler. Once bound, the properties are exposed to the Content Contributor via the 'Custom' menu on the widget element.
- The Render Handler is typically coded to use these properties to control the widget's rendering.
- Unless a widget does not have a Metadata Form, it is required to download and import the Metadata Form.
- After importing, the Metadata Form may need to be manually bound to the appropriate Render Handler. If multiple Render Handlers and/or Metadata Forms are provided in the widget, look in the instructions for each widget to understand which Metadata Form binds to what Render Handler.
- When the Widget is first rendered there is no associated custom metadata for the render handler. Please save the Custom form, even if you do not make any changes, so the Widget can function properly.
- See Binding Metadata Forms to Render Handlers.
- Default Custom Element (optional)
- Most widgets will provide a 'default' Custom Element definition (GCE) that you can use to create data for the widget. However, because most of the Render Handlers are configured as 'Generic' Render Handlers, you are not required to download and use the 'default' Custom Element. You can use you own Custom Element and bind it's fields to the widget's generic Render Handler.
- For example, for the Image TextBlock Widget, we provide a default Custom Element that has the following fields: Image, Title, Description, LinkURL. If you have a similar element, with similar fields (for example a Profile element or News element), you don't need to download our default element. You can use your own.
- To bind your own Custom Element to the widget's Render Handler(s), you must first import the widget's Render Handler into your Custom Element. See Importing Render Handlers below. Then you must map the fields in your Custom Element to the fields required by the Render Handler. See Mapping Custom Element Fields to Generic Render Handlers.
- Some widgets use a standard CommonSpot element (for example the Slider Menu uses the Tree Navigation element). For these widgets, no Custom Element download will be provided. You simply need to download and import the Metadata Form and Render Handler packets.
- If you want to use the default custom element that ships with the widget, you need to:
- Most widgets will provide a 'default' Custom Element definition (GCE) that you can use to create data for the widget. However, because most of the Render Handlers are configured as 'Generic' Render Handlers, you are not required to download and use the 'default' Custom Element. You can use you own Custom Element and bind it's fields to the widget's generic Render Handler.

- Download & Import Custom Element
- Download & Import Metadata Form
- OR Download & Import the Master Packet that includes all the required pieces of the Widget. Do this via the Site Admin > Utilities > Import Packet tool. You still need to perform Step 4 below.
- Bind the Metadata Form to the appropriate Render Handler
If you have your own custom element, you need to:
- Download & Import Metadata Form
- Download & Import Render Handler
- Bind the Metadata Form to the appropriate Render Handler
See the appropriate section below for instructions on importing each of these components.
- Resources (included)
- A CommonSpot Widget may utilize a JavaScript, JQuery or other third party plugin for its rendering.
- Widgets utilize the CommonSpot Resource Loading Framework to load resources.
- A widget may require certain common framework level resources (like JQuery, jQueryUI, Bootstrap, etc). If these are required, you need to be sure that you have resources defined for these libraries, as they will not be included in the widget download.
- For specific JQuery plugins, the widget will include the necessary CSS and/or JavaScript files for the third-party libraries, and will automatically register the resources for you on import. If you already have the resources registered, the import process will detect this and prompt you how to proceed.
Importing a Widget with the Import Packet Utility
There is now an ‘Import Packet’ menu option under the Site Administration > Utilities menu. From here you can import a packet with multiple sub-packets. The user interface will unzip the main packet and display a listing of the contained packets. You will then import each sub-packet by following the appropriate import dialog chain based on the type of object (custom element, metadata form, render handler, custom field type).
- Note: You can Import stand-alone custom element or metadata form packets from here as well, as you would in the Manage Elements or Metadata Forms dialogs.
- In a Shared Database Environment, you must run Synchronize Custom Modules in the Shared Database tools in Site Administration.

 C
C
1. Click the Import button for each of the objects and proceed through the dialogs:
 Custom Metadata Form.
Custom Element.
Choose the Category if necessary and click Next.

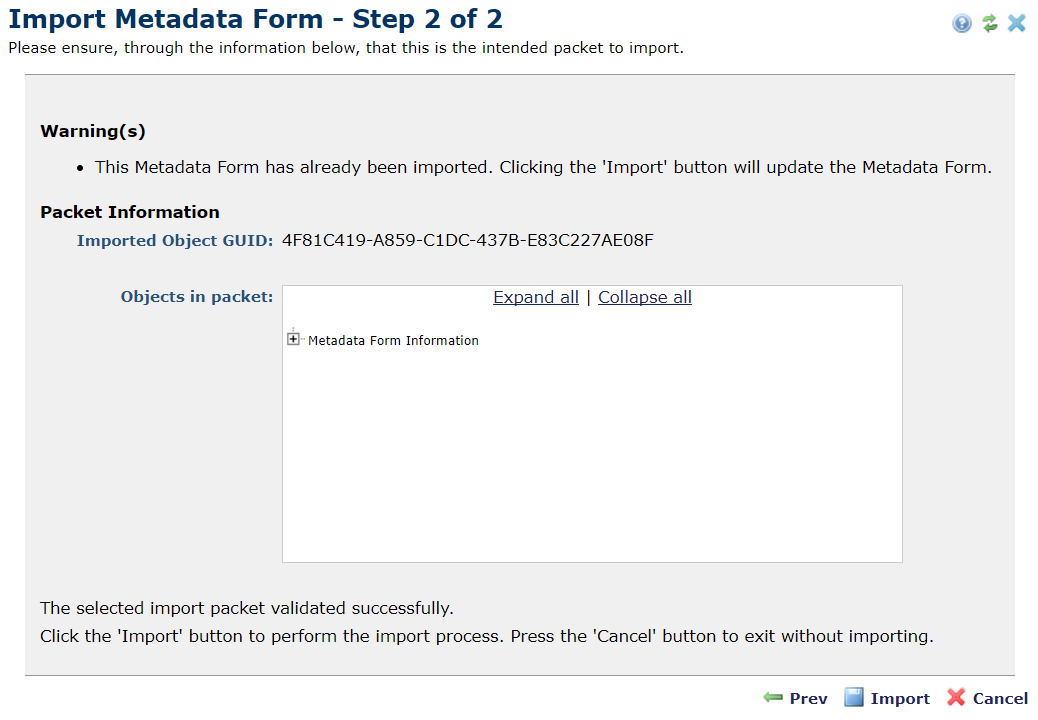
After closing the confirmation dialog...
we are returned to the main Import Packet - Step 2 of 2 dialog to continue importing the rest of the objects...

Continue to import or click close to cancel out of the import process.
Importing Custom Elements
- Review the information and click 'Import'. In this screen shot, all 4 of the required resources were already registered in CommonSpot on this server.
-

-
Note for the framework libraries, such as JQuery or Bootstrap you will need to create these resources if you have not already. If you are using the CommonSpot Application Development Framework, these resources may already be registered.
-
Note that if you are re-importing the Custom Element, which has already been imported, and you are NOT using the Sample Custom Element, you need to check to ensure that the Field Mappings are correct for any Generic Render Handlers that got imported with the packet. Any new fields will not be automatically mapped as part of re-importing.
Import Metadata Forms
-
For a Custom Metadata Form you may be prompted to overwrite an existing copy. Review the information and click 'Import'
Import Render Handlers
If you are importing a custom render handler to use with your existing custom element you can do this from either the Import Packet dialog or from within the Import Packet Utility.
- In the CommonSpot 'Site Admin' select from the left menu 'Elements & Forms' > 'Elements'.
- From the 'Manage Elements' dialog find the element that you want to use as your base element for this widget.
-
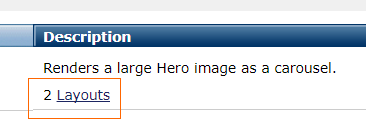
Click on the 'Layouts' link under the element description text.
-
From the 'Manage Layouts' dialog click on the 'Import Generic Render Handler' link at the bottom of this dialog.
-
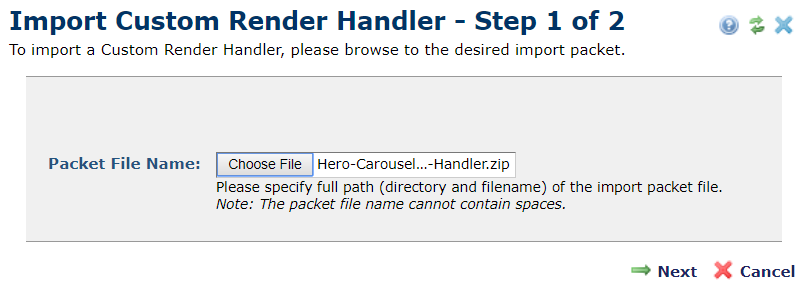
From the “Import Custom Render Handler - Step 1 of 2” dialog, browse your local machine for the downloaded Render Handler packet.
-
Click 'Next'
-
From the "Import Custom Render Handler - Step 2 of 2' Resource Assignment dialog, for each resource listed evaluate whether to import or not.

-
Note for the framework libraries, such as JQuery or Bootstrap you will need to create these resources if you have not already done so. Note that if you are using the CommonSpot Application Development Framework these resources may already be registered.
-
Click 'Import'
Binding Metadata Forms to Render Handlers
After you have imported the Metadata Form and Render Handler (see steps above), you may need to bind the Render Handler to the widget's Custom Metadata Form. In most cases, the Metadata Form will self-bind to the Render Handler. Please check that the form and render handler are bound together.
-
In the CommonSpot 'Site Admin' select from the left menu 'Elements & Forms' > 'Metadata Forms'.
-
From the 'Metadata Forms' dialog find the Metadata Form that you imported, and if the Render Handler is no listed as bound, click the pencil icon. Then choose the 'Add Bindings...' menu.
-
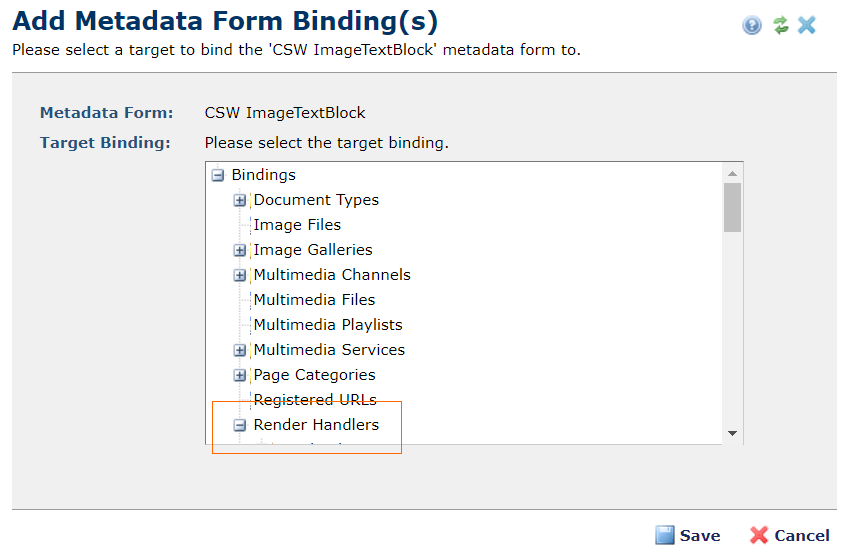
In the 'Add Metadata Form Bindings' dialog, expand the 'Render Handlers' node in the 'Target Bindings' tree, Then keep expanding the Element Category, then Element until you find the imported Render Handler.
-
Click Save.

Mapping Custom Element Fields to Generic Render Handlers
To use your own Custom Element with an imported generic render handler, you need to map the fields in your Custom Element to the required fields of the Render Handler. You may still download the master export packet that includes the Sample Custom Element, you just will not need to import it. You will still import the Custom Metadata Form and Generic Render Handler. To do this, follow these steps:
- Go to the CommonSpot Site Admin, select from the left menu 'Elements & Forms' > 'Elements'.
- From the 'Manage Elements' dialog find your Custom Element.
-
Click on the 'Layouts' link under the element description text.
-
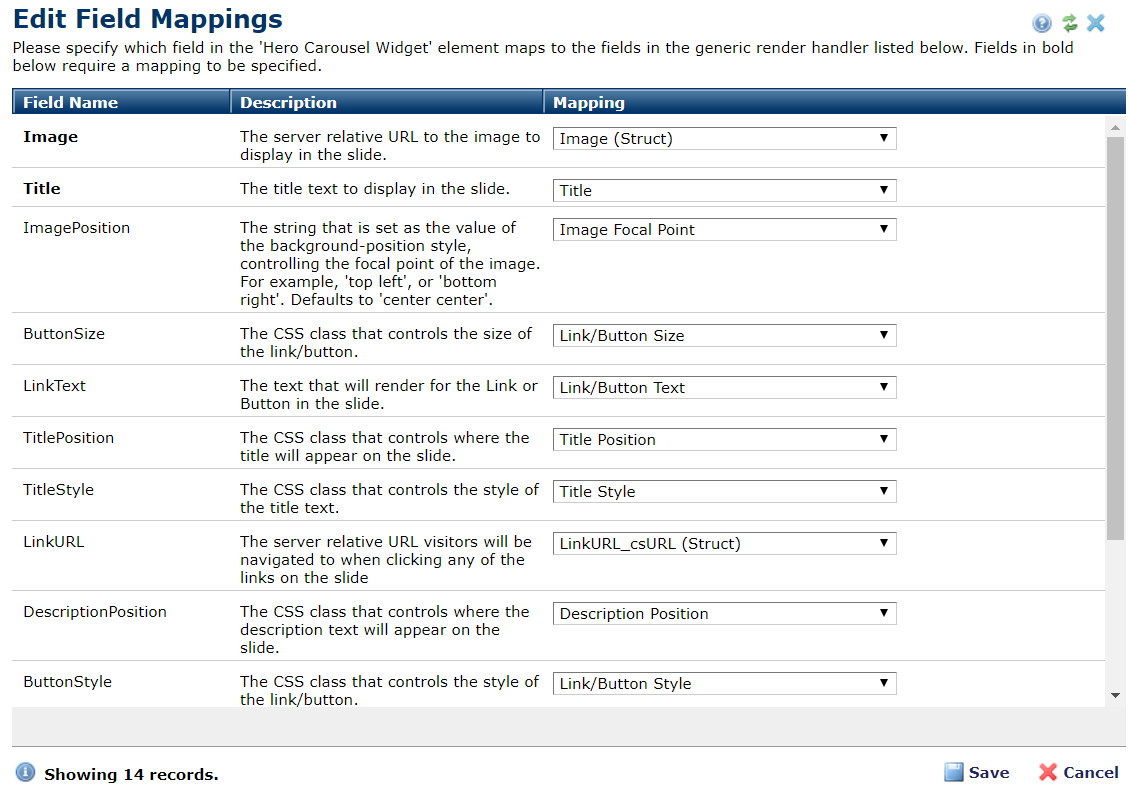
From the 'Manage Layouts' dialog, find the Generic Render Handler that you imported and click on the pencil icon in the Actions column and choose the Edit Field Mappings dialog.
-
For each of the required fields you will need to choose the corresponding field from your Custom Element, by selecting it from the drop down list in the Mapping column. Note you are only required to provide mappings for the required (bold) fields.

Widget Page/Template Setup
Once you have imported all the necessary components for the widget, and manually bound the Metadata Form to the Render Handlers, you are ready to use the widget just like any other CommonSpot element. Simply navigate to the page or template where you want to place the widget, and insert the widget's main element. After you add data, you may need to set the layout to use the desired render handler if it is not already set.
Overriding Fields/Parameters in a Widget
Many of the widgets ship with fields that you will most likely want to override. For example, several of the widgets allow specifying a background or font color. The options that are provided in the Widget's Metadata Form or Custom Element Form for these fields probably don't match the color scheme of your site. To override options such as these, simply follow these steps:
- For Fields in Metadata Forms:
- In the CommonSpot 'Site Admin' select from the left menu 'Elements & Forms' > 'Metadata Forms'.
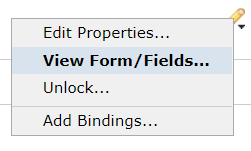
- From the 'Metadata Forms' dialog, find the Metadata Form that contains the field. Click the pencil icon and choose 'View Form/Fields...'
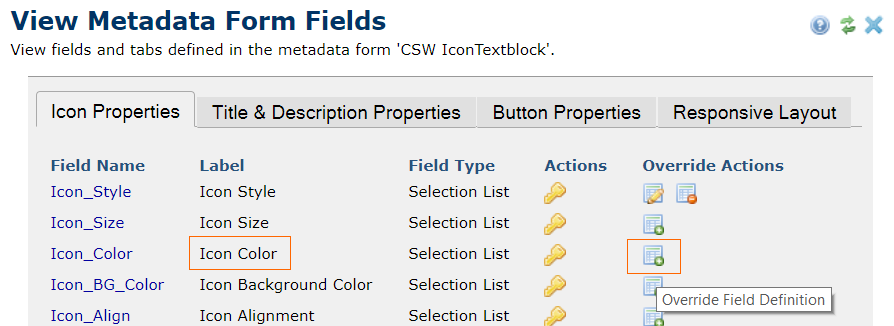
- In the 'View Metadata Form Fields' dialog, find the field you want to override. Click on the 'Override Field Definition'
icon in the 'Override Actions' column.
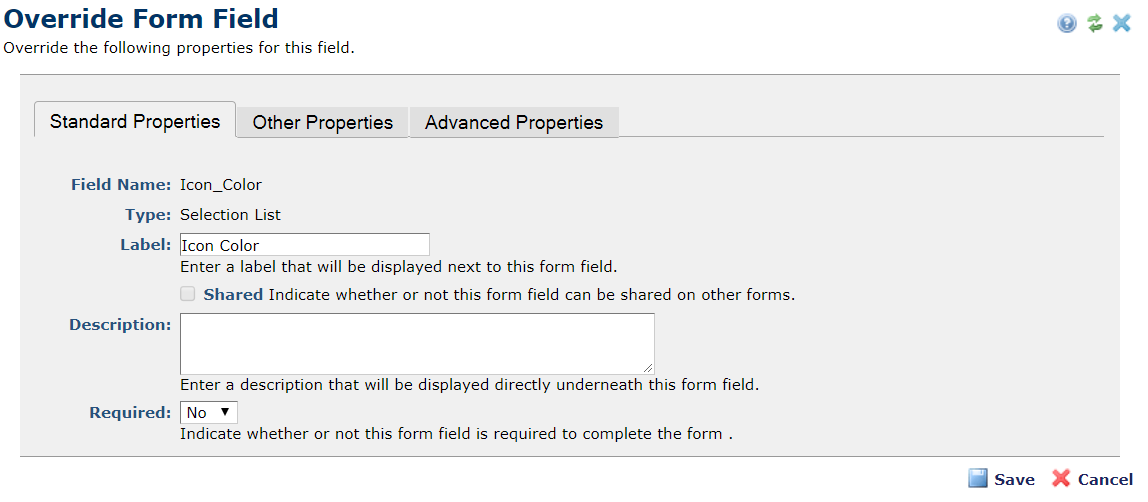
- Then in the 'Override Form Field' dialog you can modify any of the field's properties (i.e. you can make the field required, or change the options for a selection list, etc.)
- For Fields in Custom Element Forms:
- In the CommonSpot 'Site Admin' select from the left menu 'Elements & Forms' > 'Elements'
- From the 'Manage Elements' dialog, find the Custom Element Form that contains the field. Click the pencil icon and choose 'Field Definitions...'
- In the 'Custom Element Field Definitions' dialog, find the field you wish to override and click the 'Override Field Definition'
- In the 'Override Form Field' dialog you can modify any of the field's properties. For example, you can make the field required, or change the options for a selection list, etc. Be mindful that changing options my interfere with proper Widget functionaliy and is not recommended without adequate knowledge of how this functionality works.


Once you have overridden a field, you will see an 'Edit Field Override' icon and a 'Undo Field Override'
icon in the 'Override Actions' column.

- Clicking the 'Edit' icon will allow you to edit your overridden properties
- Clicking the 'Delete' icon will warn that you are about to delete your overridden field properties. The field is not deleted.
If you click 'Revert' your overridden properties will be permanently deleted, and the original properties for the field will be restored.

WARNING: Once imported, you never want to unlock a Metadata Form or Custom Element. Unlocking the element will break all references to the imported object and any updates to the widget can not be re-imported.